


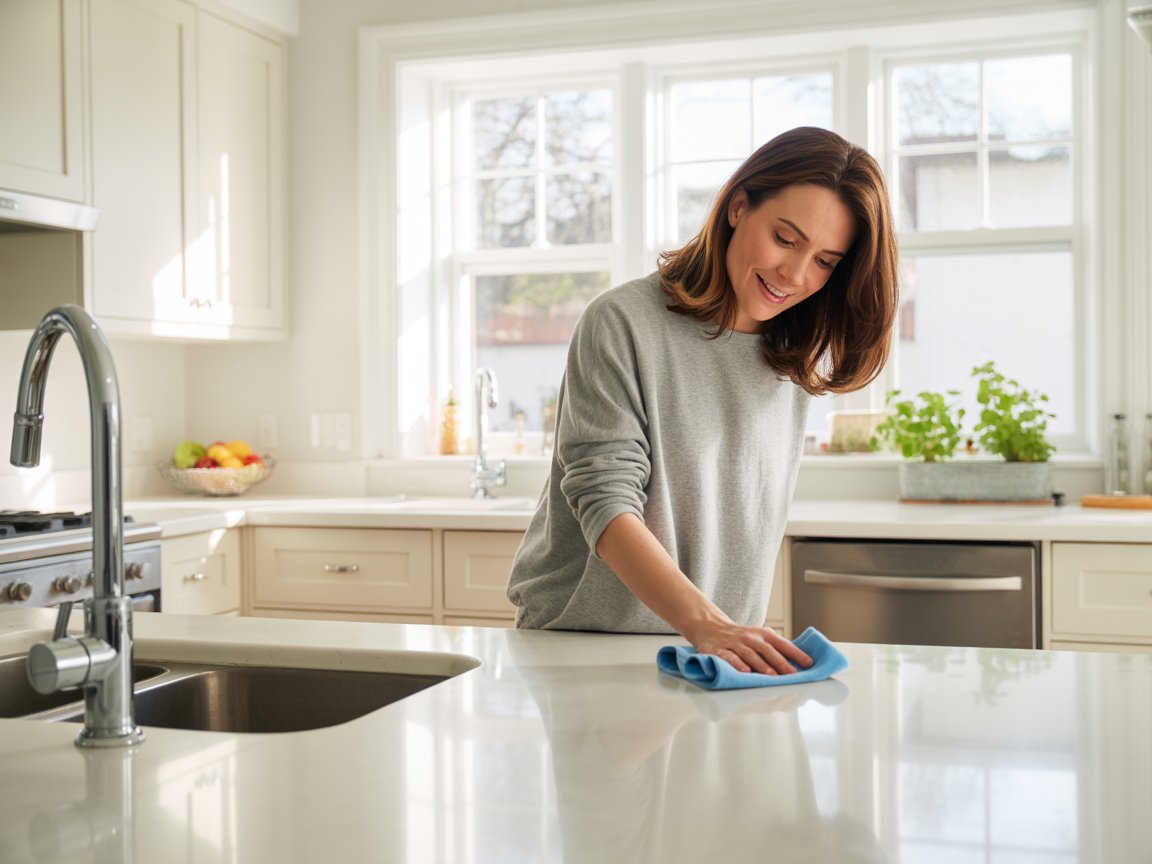
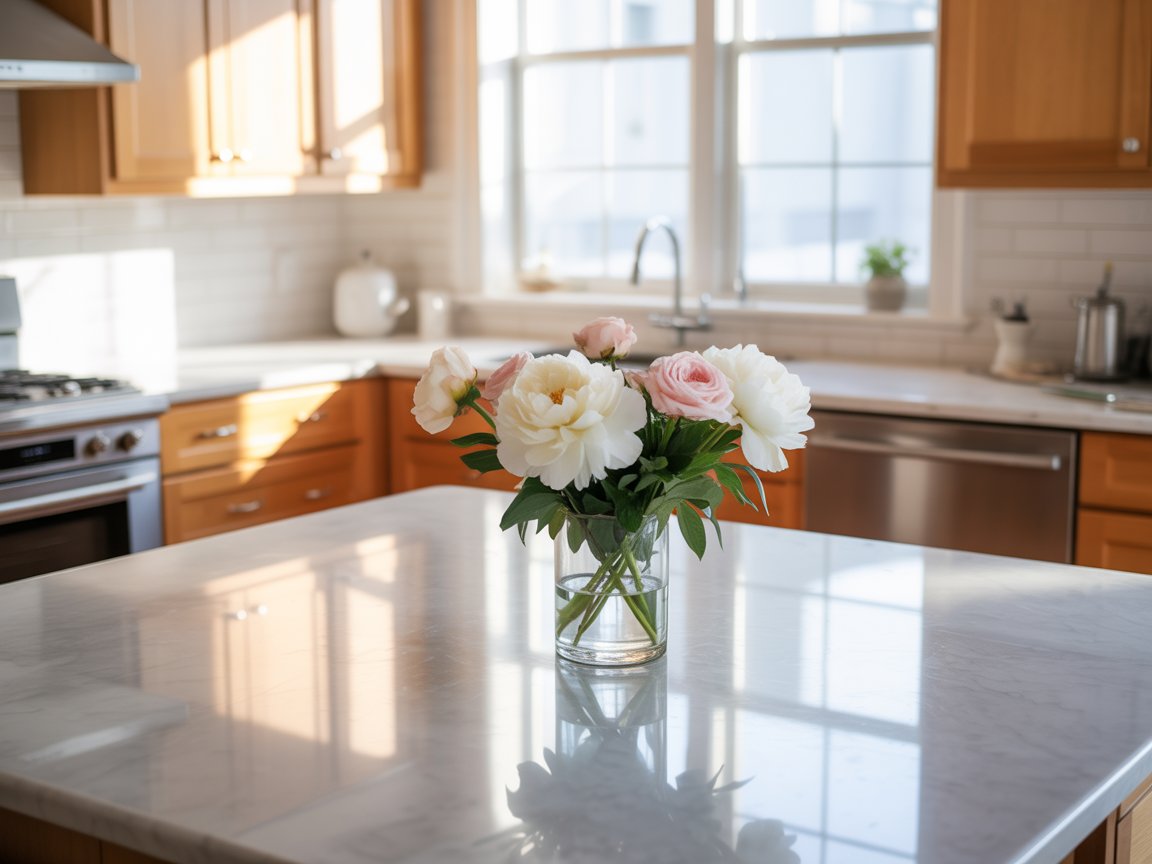
A kitchen can look clean and still be risky
Quick question.
If I swabbed your sink, sponge, and fridge handle right now, would you want to see the results?
Most people don’t.
Not because they’re dirty.
Because kitchens hide “invisible mess.”
"Most people don't. Not because they're dirty. Because kitchens hide 'invisible mess.” — Author: Wells Ye
Here are the numbers I keep in my head when I clean:
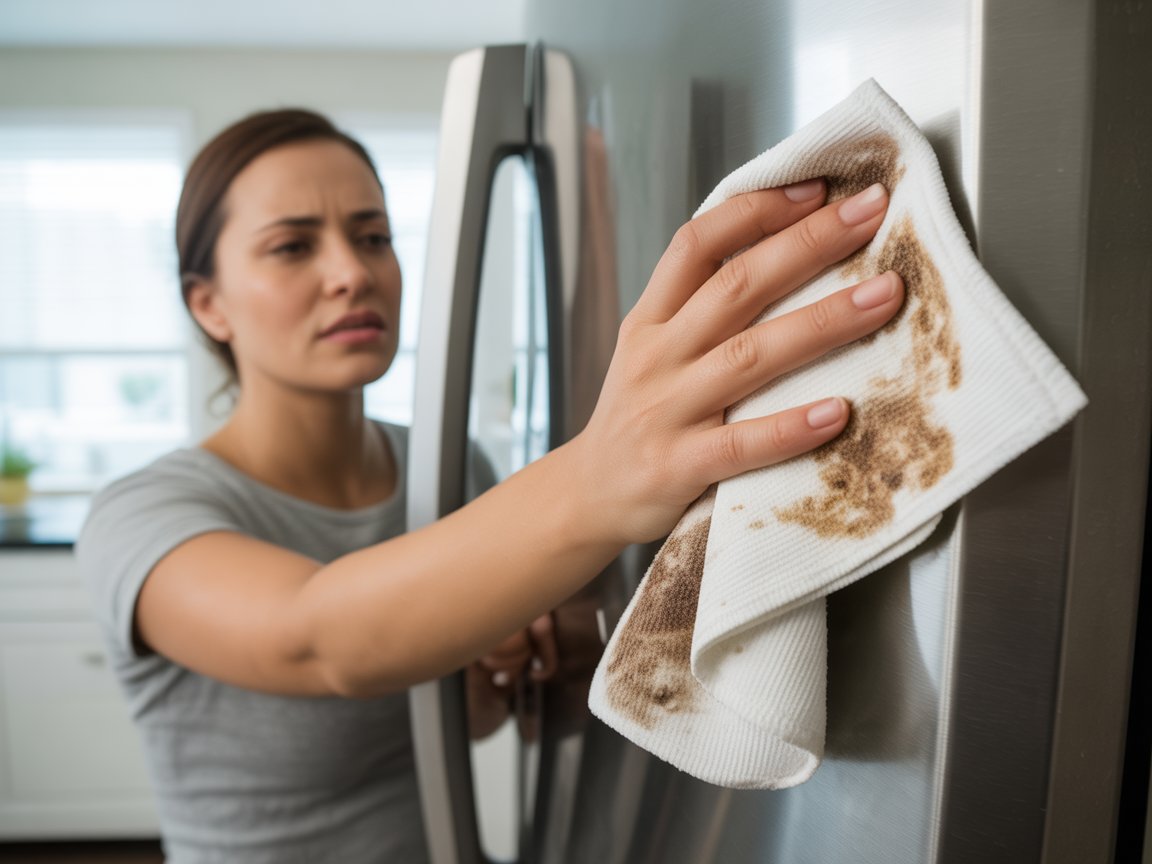
The “clean” kitchen that wasn’t
A client once told me, “My kitchen is already clean.”
The counters were clear.
The floor looked great.
It smelled like lemon.
Then I opened the fridge.
Under the drawer was a sticky film.
And the fridge handle looked fine… until I wiped it with a white cloth.
That kitchen didn’t need more effort.
It needed a better order.
"Order means light and peace, inward liberty and free command over one's self; order is power."— Henri Frédéric Amiel
What you’ll get from my process
In this guide, I’m going to share:
- My quick assessment to choose deep clean vs general clean
- My 8-step cleaning order (dry pass → wet pass → floors last)
- A wipe option and a steam option for the key areas
- A maintenance routine that keeps your kitchen clean with less work
Now, here’s what I see in almost every home.
Your kitchen works harder than any other room in your home. Grease splatters bake onto surfaces. Microscopic oil settles on cabinets. Food residue hides in corners. Whether you cook daily or just on weekends, the evidence builds up.
That brown splatter behind the stove? Baked-on cooking grease. The sticky film on cabinet doors? Layers of airborne oil. The funky smell when you open the fridge? Food that overstayed its welcome.
These aren’t seasonal problems.
They’re everyday kitchen reality.
"These aren't seasonal problems. They're everyday kitchen reality." — Author: Wells Ye
Why I lean on DI water + HOCl (and avoid chemical residue)
I’m Wells Ye, owner of Fresh Tech Maids specializing in chemical free cleaning.
I’m careful about one thing that changes everything: residue.
Nearly 100% of house cleanings are based on chemical cleaners.
If “clean” leaves cleaning chemical film behind, it becomes a dirt magnet.
Dust sticks.
Grease sticks.
And you’re cleaning again fast.
The cleaning chemical film on every surface of your kitchen is unsafe and unhealthy.
That’s why I use deionized (DI) water as a general cleaner.
It's the purest water. DI water is an excellent chemical-free general cleaner because it is "hungry" — grabbing dirt through its instability and electrical properties. DI water leaves no chemical residue on surfaces.
"My rule: Clean and disinfect without leaving cleaning chemical film everywhere!"— Author: Wells Ye
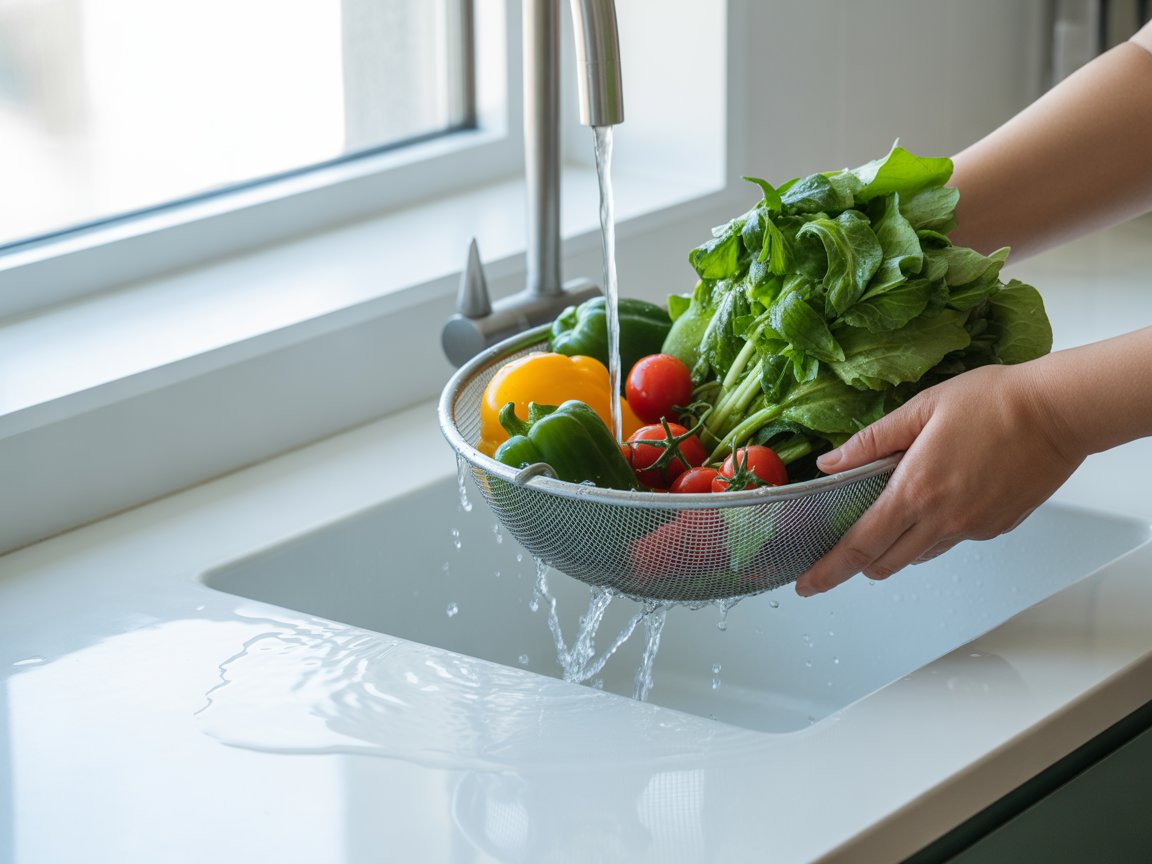
And when I need targeted disinfection for high-touch areas, I use hypochlorous acid (HOCl).
This is the miracle disinfectant — after disinfecting, the final byproduct is just water and a tiny amount of salt. It is a potent disinfectant, yet completely safe.
HOCl is widely used to clean vegetables and other produce because it's a powerful, safe, and natural disinfectant that kills harmful bacteria and viruses without leaving chemical residues.
My rule:
Clean and disinfect without leaving cleaning chemical film everywhere!
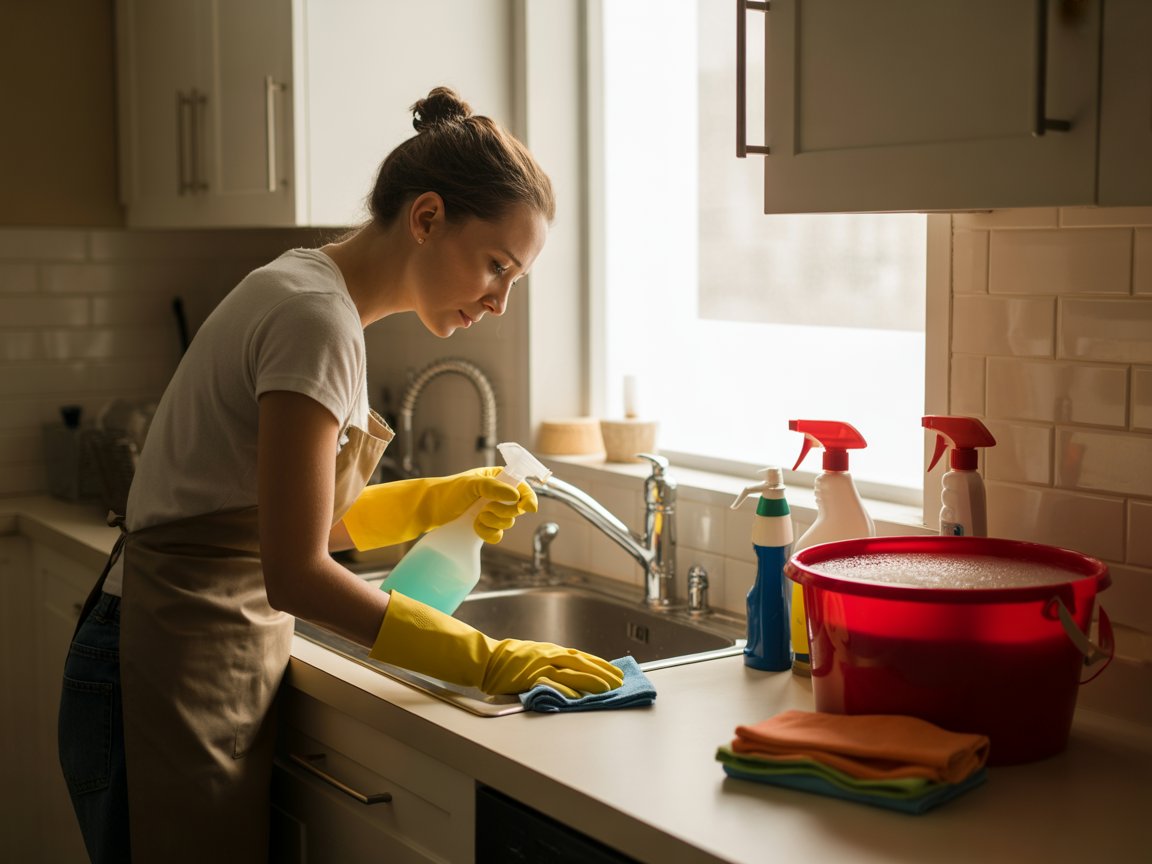
Do these 5 things today
If you do nothing else, do these 5 (under 15 minutes):
- Toss the sponge if it smells or is older than 2 weeks.
- Rinse and scrub your dishwasher filter.
- Wipe fridge handle + microwave handle + stove knobs with HOCl (follow label dwell time).
- Check your fridge temp (aim ≤ 40°F / 4°C).
- Clear one counter section and keep it as your “clean prep zone.”
"The journey of a thousand miles begins with a single step." — Lao Tzu
What you get back
A reset kitchen gives you:
- Faster cleanup after meals
- Less odor (sink, fridge, dishwasher)
- More food-safety confidence
- Less stress when you walk in
"Small daily improvements over time lead to stunning results." — Robin Sharma
Now let’s name the hidden toll.
The Hidden Toll of a Neglected Kitchen — And What It Means for Your Family

If our home is a messy danger, how can we work, rest, and recharge? A neglected kitchen brings stress, illness, and risk affecting every part of life.
Food safety hazards
- Cross-contamination from raw meat/poultry
- Salmonella survives on kitchen surfaces up to 32 hours (USDA, 2015)
- 60% who wash raw poultry still have bacteria in their sink (USDA, 2022)
- Leftovers are generally safe only 3–4 days in the refrigerator (FoodSafety.gov, 2024)
The consequences
- Severe diarrhea, vomiting, fever
- Higher risk for kids, older adults, and immunocompromised
- Salmonella: 1.35M infections, 420 deaths yearly (U.S.) (CDC, 2024)
- E. coli can cause kidney failure (CDC, 2024)
- Listeria can be dangerous in pregnancy and for newborns (CDC, 2024)
Grease and grime buildup
- Carbonized oven grease = fire hazard
- Airborne grease settles on cabinets and vents
The consequences
- 170,000 home cooking fires in 2021 (USFA, 2023)
- Residential fires overall caused 2,540 deaths and $8.21B property loss in 2021 (CPSC, 2023)
Appliance strain
- Dusty fridge coils reduce efficiency
- Clogged dishwasher filters breed odor
The consequences
- Coil buildup can increase energy use; some experts estimate up to ~25% (Better Homes & Gardens, 2026)
- DOE recommends cleaning coils; average fridge lifespan is about 12 years (DOE, 2022)
- Dishwasher replacement often $500–$1,500 (HomeAdvisor, 2025)
- Refrigerator replacement often $1,500–$3,000+ (Fixr, 2025)
Contamination hot spots
- Sponges/rags, cutting boards, sink, handles/knobs
The consequences
- Coliform bacteria found on 75%+ of dish sponges/rags (NSF, 2011)
- Drexel found fecal coliforms in 44% of kitchens (Drexel University, 2017)
Focus and Productivity
- Visual clutter reduces working memory and creates mental burden
The consequences
- Clutter increases cortisol (stress hormone) levels, leading to low-grade anxiety and making you more short-tempered with family. (WebMD)
"If our home is a messy danger, how can we work, rest, and recharge?"— Author: Wells Ye
The Three-Phase Framework: My Complete Kitchen Cleaning Process
This is the professional and most effective approach to kitchen cleaning. It is designed to minimize time and maximize results.
- PHASE 1: Initial Setup Cleaning ("Get Your Kitchen in Good Condition").
- Purpose: Establish a clean baseline so maintenance is easy.
- When: Before you can effectively maintain.
- PHASE 2: Maintenance Cleaning ("Keep It Clean").
- Purpose: Preserve your clean kitchen with minimal effort.
- Type: Quick, light cleaning only—NEVER deep cleaning.
- PHASE 3: Periodic Reset ("Occasional Deeper Cleaning").
- Purpose: Address what maintenance can't handle over time
"To be prepared is half the victory." — Miguel de Cervantes
Your Kitchen Cleaning Assessment
Answer these 10 Yes/No questions:
Your Results Plan
Important Note: If you said YES to questions #8, #9, or #10, you need Deep Cleaning regardless of your total score.
Phase 1: Initial Setup Cleaning — Get Your Kitchen in Good Condition
Phase 1 is the “Get Your Kitchen in Good Condition” step.
A) Deep cleaning or general cleaning?
Deep cleaning means more detailed wiping and more inside-appliance work. While general cleaning focuses on visible surfaces, light dusting, vacuuming, mopping, and basic tidying to keep your home consistently clean.
This distinction is about HOW you clean, not WHAT you clean.
- Deep Cleaning Methodology: I hand wipe ALL surfaces—horizontal AND vertical. This is more thorough and takes longer. I use this for setup or heavy oil cooking households.
- General Cleaning Methodology: I hand wipe ONLY horizontal surfaces. I dust vertical surfaces and only hand wipe if visible stains are present.
The Science: Horizontal surfaces accumulate dirt that attaches to the surface. Vertical surface dust typically falls down and doesn't attach, unless oily cooking causes oil to layer on vertical surfaces.
B) Determine your timeline options
Execution Strategy:
- The Relay: 1 Weekend. Best for small kitchens or apartments.
- The Long Distance: 2 Weekends. Best for medium/large family kitchens.
C) Tools and Supplies I Use
Here are the specific tools I use. I prefer chemical-free options like DI Water and HOCl to avoid residue.
Caution: Materials react differently. Test cleaners/steam in a hidden spot. Never steam electronics. Avoid steam on unsealed wood or delicate finishes.
D) My 8-step kitchen cleaning process (the order matters)
These steps apply to BOTH General and Deep cleaning. The difference is in the hand-wiping of vertical surfaces.
Step 1: Prepare Your Station
I put on my apron with tools in pockets and place my bucket beside the sink. I minimize movement by having everything ready.
Step 2: Remove Garbage and Rugs
I take out all the trash and remove rugs and mats. I clear the workspace before cleaning.
Step 3: Spray and Soak (The "Free Lunch")
I spray the sink, stove, and tough spots. I let the chemicals/water work while I do other tasks. Soaking loosens stuck deposits with free effort.
Step 4: High-Low Dusting
I start at the TOP and work DOWN. Dust falls to the floor, which I will clean last. I cover horizontal and vertical surfaces and corners.
Step 5: Dry Trip (First Circle)
I start at one location and move clockwise, section by section, top-down. I address upper cabinets, countertops, lower cabinets, and baseboards.
- Option A (Wipe cleaning): I hand wipe or dust based on my methodology (Deep vs. General).
- Option B (Steam cleaning): I use a steam cleaner with the appropriate attachment, working in small sections and wiping dry immediately.
- Caution: I do NOT steam unsealed wood, laminate, or granite surfaces.
Step 6: Wet Trip (Second Circle)
I focus on the tough, wet areas I soaked earlier: the sink area, stove/cooktop, and backsplash.
- Option A (Wipe cleaning): I wipe these areas clean now.
- Option B (Steam cleaning): Steam is excellent for stovetop grease and tile backsplashes. It loosens burnt-on residue, which I follow with a microfiber cloth to wipe away.
Step 7: Disinfect High-Touch Areas
- Option A (Wipe cleaning): I spray disinfectant on handles, knobs, and switches. I leave it for 7 minutes because disinfectant needs time. Note: Disinfectant won't work on dirty surfaces—that's why this comes AFTER cleaning.
- Option B (Steam cleaning): If I use steam cleaning, disinfecting is already done. Steam at 200°F kills 99.9% of bacteria and viruses without chemicals.
Step 8: Floor Cleaning
The floor is always LAST because all dirt has fallen here.
- Option A (Wipe cleaning): I vacuum in one direction, then perpendicular. Then I mop in one direction, then perpendicular. This two-direction technique is more thorough.
- Option B (Steam cleaning): I use a floor steam mop attachment and work in sections. This kills germs while cleaning.
- Many steam-cleaning guides cite sanitizing benefits on sealed surfaces when used correctly; follow tool and floor manufacturer rules). (Better Homes & Gardens, 2025)
- Caution: Do NOT use it on hardwood or unsealed floors—steam can cause warping.
"Excellence is not a skill. It is an attitude." — Ralph Marston
E) After the 8 steps: follow the critical kitchen areas (wipe option + steam option)
Following the 8 steps above, I encounter specific appliances and critical areas. Here is my detailed breakdown for each.
1) Inside refrigerator
Your refrigerator handles raw meats and leftovers. It needs a complete food safety reset.
Why: Drexel found 43% of home fridges above 41°F.
Wipe cleaning: empty → wash shelves → DI wipe → dry → HOCl disinfect.
Steam cleaning: dry-steam interior → wipe dry (avoid gaskets).
Time: 20–45 min.
Result: no odor, safer storage.
Pro tip: Clean before grocery day, pair it with laundry, and date-label leftovers so nothing hides in the back.
2) Inside oven
Accumulated grease splatters are a fire hazard.
Why: grease buildup links to cooking fire risk.
Option 1 (recommended) : self-clean → ventilate → wipe ash.
Option 2: chemical soak overnight → scrape → wipe until residue-free.
Option 3: steam-clean cycle or steam tool on cooled surfaces → wipe dry.
Time: 30–60 min active + 12+ hrs passive.
Result: less smoke/odor.
Pro tip: Ventilate well during self-clean, try an overnight soak if you're short on time, and a quick weekly wipe prevents big buildup.
3) Stovetop + backsplash
The stovetop and the wall behind your stove take the brunt of continuous cooking and grease buildup is a fire hazard and visually messy.
Why: knobs/grease transfer to hands and food prep.
Wipe cleaning: soak parts → degrease → scrape spots → dry.
Steam cleaning: steam lightly → wipe dry.
Time: 15–30 min.
Result: no sticky knobs. The stovetop shines.
Pro tip: A weekly deep wipe works best, but even a 2-minute wipe after cooking keeps hosting easy.
4) Inside microwave
It is splattered with food evidence that breeds bacteria.
Why: splatter becomes odor fast.
Wipe cleaning: heat water bowl → sit 2 min → wipe.
Steam cleaning: steam interior → wipe dry.
Time: 10–15 min.
Result: no smell. No contamination.
Pro tip: Wipe after messy meals, do it while your coffee brews, and don't forget the handle — it gets touched constantly.
5) Inside dishwasher
A clogged filter breeds bacteria and creates odors.
Why: dirty filters = odors; contaminated clothes are common.
Wipe cleaning: rinse filter → scrub → wipe gasket/edges → run hot cycle.
Steam cleaning: steam door edges/gasket lightly → wipe dry → run hot cycle.
Time: 20 min active + 2 cycles.
Result: cleaner dishes, less odor.
Pro tip: Rinse the filter weekly if you cook often, do it while unloading, or monthly is enough for lighter use.
6) Range hood filter
A saturated filter is a major fire hazard.
Why: it traps airborne grease; buildup is a safety issue.
Wipe/soak cleaning: remove → soak hot water + soap + baking soda → scrub → dry.
Steam cleaning: steam hood exterior only (follow manufacturer).
Time: 30–45 min (incl soak).
Result: better ventilation, less cabinet film.
Pro tip: Monthly for heavy cookers, every 6–8 weeks for moderate use — either way, clean it before you smell it.
7) Kitchen sink
Your sink has more bacteria than other places in your home.
Why: NSF found coliform on 45% of sinks.
Wipe cleaning: scrub basin + drain rim → rinse → HOCl → dry.
Steam cleaning: steam basin/faucet lightly → wipe dry → HOCl touchpoints.
Time: 15–20 min.
Result: no slime, no smell. Just clean!
Pro tip: Wipe daily after handling raw meat, do a 2-minute nightly reset, and keep a drying cloth nearby to stay ahead.
8) Countertops
Your primary food prep surface must be residue-free.
Why: raw food, packages, backpacks all land here. Germ heaven!
Wipe cleaning: brush dry dust to floor → Soak → DI wipe → scraper removes spots → HOCl disinfect.
Steam cleaning: brush dry dust to floor → steam sealed counters → wipe dry → HOCl if needed.
Time: 30–45 min.
Result: no tacky film.
Pro tip: Create a strict snack zone for kids, clear surfaces nightly, and remember: fewer items out means easier cleaning.
9) Cutting boards + sponges/towels
Grooves harbor Salmonella and E. coli.
Why: coliform on 75%+ of sponges/rags.
Boards (wipe cleaning): hot soapy scrub → baking soda scrub → HOCl → air-dry upright.
Boards (steam cleaning): steam lightly → wipe dry → air-dry.
Sponges/towels: replace sponge every 1–2 weeks; swap towels every 2–3 days (wash hot).
Time: 10–15 min/board; 5 min supplies reset.
Result: fewer germs spread while “cleaning.”
Pro tip: Never use sponges for raw meat cleanup, buy supplies in bulk, and try a dish brush — it dries faster than sponges.
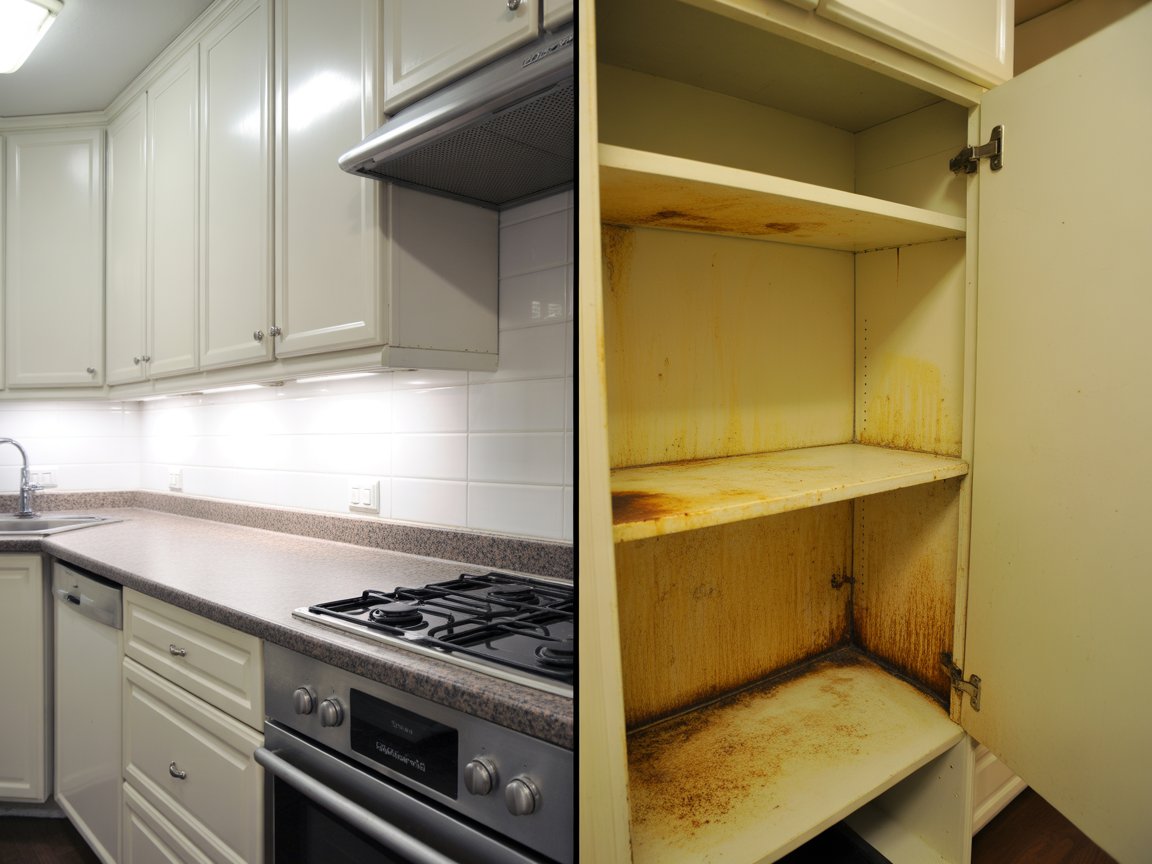
10) Cabinets (outside + inside) + baseboards (zone method)
Airborne grease settles here, creating an invisible sticky film and dust sticks in. Also, crumbs attract pests.
Why: airborne oil settles and becomes sticky film.
Wipe cleaning: DI wipe → degrease near stove/handles → dry. Inside: vacuum crumbs → DI wipe → dry.
Steam cleaning: steam carefully on sealed surfaces → wipe dry (test first).
Time: outside 1–2 hrs; inside 2–3 hrs full kitchen; baseboards 15–20 min.
Pro tip: Start with lower cabinets if you have kids, tackle one wall per week, and wipe handles plus toe-kicks to make it feel finished.
11) Overlooked areas + small appliances
These places harbor bacteria but are often missed:
Overlooked list: spice containers, can opener, fridge handle, stove knobs, switches, trash lid, drawer pulls, light fixtures, top of fridge.
Wipe cleaning: DI wipe → HOCl touchpoints → dry.
Steam cleaning: steam sealed surfaces → wipe dry (avoid electronics).
Time: overlooked areas30–45 min
Small appliances (5–15 min each): coffee maker, stand mixer, blender, slow cooker, roasting pan, toaster, air fryer.
How: Unplug → wash removable parts → DI wipe exterior → dry.
Time: small appliances 5–15 min each.
Pro tip: Wipe trash lids and switches weekly, clean appliances right after use, and store what you don't use daily.
Thinking about outsourcing? For detailed guidance, see "Should You Outsource?" below. If you want professional help, Fresh Tech Maid offers deep cleaning services.
Phase 2: Maintenance Cleaning — Keep It Clean
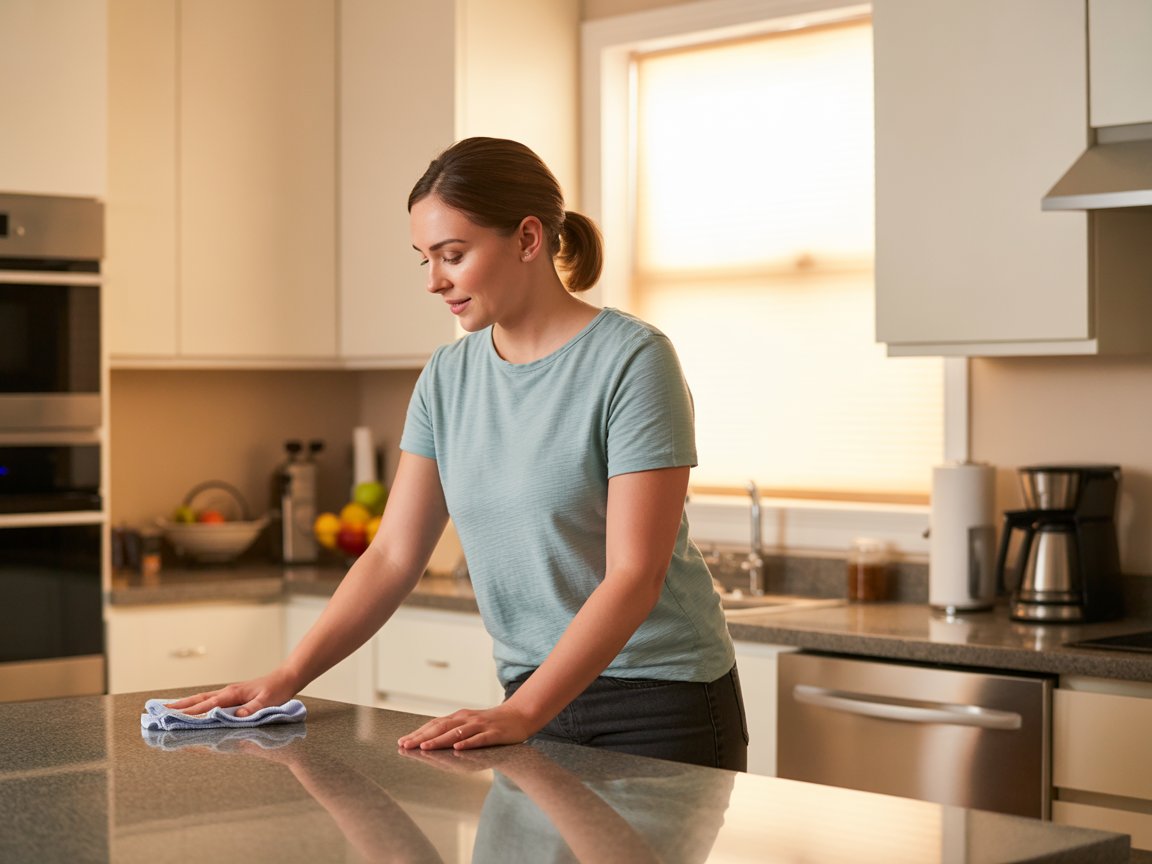
Maintenance is the same basics on repeat. This is about keeping your kitchen in a maintenance state with minimal effort.
This is NOT deep cleaning.
Apply your survey results to Phase 2
The maintenance routine (same tasks, different frequency)
This simplified version of the 8 steps takes 20-45 minutes.
- High-low dusting: Focus on visible dust (3 min).
- Surface sweep: Return items to homes (5 min).
- Stovetop quick wipe: Wipe splatters before they bake on (3 min).
- Sink wipe: Quick clean (2 min).
- Appliance exteriors: Quick wipe (5 min).
- Floor: Quick sweep/mop (7 min).
- The Rotation Concept
Instead of cleaning everything at once, I rotate through key areas. Each time you do maintenance, add ONE key area:
- Inside Refrigerator: Wipe shelves & check dates.
- Inside Dishwasher: Clean filter & run vinegar cycle.
- Under the Hood: Soak range hood filter.
- Small Appliances: Deep clean 2-3 items.
Note: Some families prefer a Recurring Maid Service Chicago schedule for maintenance, then DIY the small daily resets.
Phase 3: Periodic Reset — Occasional Deeper Cleaning

Based on your cooking frequency and your survey score, you need an occasional deeper clean. This is your “mini Phase 1.”
1) Determine your reset frequency
2) The key difference from Phase 1
Phase 1 = do everything once.
Phase 3 = clean based on the 8 steps, while pick 1–2 deep areas (then rotate):
- range hood filter
- inside fridge
- inside dishwasher
- inside oven
Methodology: Follow the Phase 1 methodology (8 steps) but selectively focus on areas of concern. Unlike the initial setup where you do everything, here you select specific zones (e.g., just the oven and range hood filter).
Should You Outsource?
Before you decide, take this survey.
It's about how YOU feel about cleaning, YOUR time, and YOUR budget. These are the question behind House cleaning Chicago and Maid Service Chicago searches:
Results:
- 0–2 Yes: DIY is best — no outsourcing needed.
- 3+ Yes: Consider outsourcing — either fully or for specific phases.
If you want professional help, my company Fresh Tech Maids offers this service using the exact process I described above.
Book Deep Cleaning Here.
"If you want to do a few small things right, do them yourself. If you want to do great things and make a big impact, learn to delegate." — John C. Maxwell
Real Life Stories: One DIY Win + One “I Needed Help” Moment

DIY win (young professional)
Sarah, a young professional in a River North apartment, used "The Relay" method to handle her small kitchen.
She broke the cleaning into one weekend.
By using the steam cleaning option for her microwave and stove, she saved hours of scrubbing.
She realized that with the right tools, specifically the steamer, she could maintain a spotless kitchen on her own without hiring a maid service in Chicago.
Result: 15 minutes a week kept the kitchen stable.
“I needed help” (parents with kids)
Mark and Linda are parents of two kids, and like most families, their kitchen takes the biggest hit.
Between school mornings, packed lunches, and busy evenings, cleaning kept getting pushed to the bottom of the list.
They tried to do a full deep clean themselves, but scrubbing greasy cabinets and buildup took far longer than they expected.
After taking our assessment, they realized a reset would help them catch up.
They brought in Fresh Tech Maids Chicago for a Phase 1 deep clean, and now they’re able to keep up with Phase 2 maintenance on their own, without giving up their weekends with their kids.
Result: One reset made weekly upkeep quick and manageable. They regained their weekends.
Frequently Asked Questions
1. What's the difference between deep cleaning and regular cleaning?
Deep cleaning hand-wipes ALL surfaces — including vertical surfaces, inside appliances, and hidden buildup. Regular cleaning focuses on horizontal surfaces and visible areas. If you have sticky film or baked-on grease, you need a deep clean first.
2. How much does kitchen deep cleaning cost in Chicago?
Professional kitchen deep cleaning typically ranges $200–$400 depending on size and condition. Always ask for a checklist of what's included — not a vague promise.
3. What's included in a deep cleaning service for kitchens?
Get it in writing. Confirm whether inside oven, inside fridge, and baseboard deep cleaning are included or billed as add-ons. These are often where the real buildup hides.
4. Weekly vs biweekly cleaning service: which is better?
If you cook daily, have kids, or hate visible buildup, weekly is usually needed. If your kitchen stays calm with a daily reset, biweekly can work. Match your frequency to your cooking habits.
5. Is steam cleaning as effective as chemical cleaning?
Yes. Steam at 200°F+ kills 99.9% of bacteria without chemical residue — making it safer for children and pets. However steam cleaning needs more set up time and more attention to safety (safety for materials and the operator).
6. How often should I deep clean my kitchen?
Based on your cooking frequency: Daily cookers need quarterly deep resets. Moderate cookers need semi-annual resets. Use the maintenance phases between deep cleans to stay ahead. Please see our survey and evaluation criteria in this blog (under the section "Your Kitchen Cleaning Assessment") to determine your exact reset frequency.
The Complete Kitchen Deep Clean Checklist: Your Guide to a Food-Safe Fresh Start
Use this as a fridge note or phone checklist.
Your Kitchen Fresh Start

If your kitchen feels like it’s always “almost clean,” you’re not failing.
You’re missing a system.
A system of 3 phases:
Phase 1: Reclaim your kitchen. Work through the 8-step process and feel the weight lift as every surface, appliance, and hidden corner gets the attention it deserves.
Phase 2: Based on how often you cook, follow simplified daily and weekly rituals that take minutes, not hours. This is where "almost clean" becomes "always clean."
Phase 3: The Rotation, monthly or quarterly attention to areas of concern and small appliances. No more forgotten grease traps or neglected cabinet interiors. Just steady, manageable progress.
Your 5-step action plan for this week:
- Take the 10-question survey to understand your kitchen's current state.
- Choose your pace: Relay (1 weekend) or Long Distance (2 weekends).
- Follow the 8-step deep reset — one zone at a time.
- Set your maintenance frequency based on your cooking habits.
- Schedule your first rotation on the calendar (and protect that time).
"I do not view a healthy kitchen as a luxury. It is a necessity. It fuels my life."— Author: Wells Ye
My home is my sanctuary, but the kitchen is my heartbeat. It protects my physical and mental health.
I do not view a healthy kitchen as a luxury.
It is a necessity.
It fuels my life.
Free Checklist! Print it. Pin it. Use it.

The Complete Kitchen Deep Clean Checklist: Your Guide to a Food-Safe Fresh Start
Inside this checklist:
- The 8-step professional cleaning process
- Monthly calendar tracker with weekly checkboxes
- Daily & weekly task instructions
- Bi-weekly, monthly, and quarterly schedules
- And more...
Use this as a fridge note or phone checklist.
Get Your Kitchen Deep Clean Checklist
